
Intro
Please complete the Parsempo Player App installation to your Screen device or media player device and Parsempo Control App to your mobile phone before setting up your screens.
If you intend to add Anonymous Audience Measurement to your screen, it will require an image sensor (built-in camera or webcam)
Check out our guidelines for Image sensors and Cameras for more information.
Connecting the webcam to the media player or screen before setup is recommended. However, audience analytics can be added anytime after the screen is set up.
Follow these steps to set up a Screen:
Start Parsempo Player App on your screen:
Touch screens/tablets – Tap the Parsempo Player app
External media players – Connect a keyboard or mouse to launch the app
Step 1: Choose Orientation
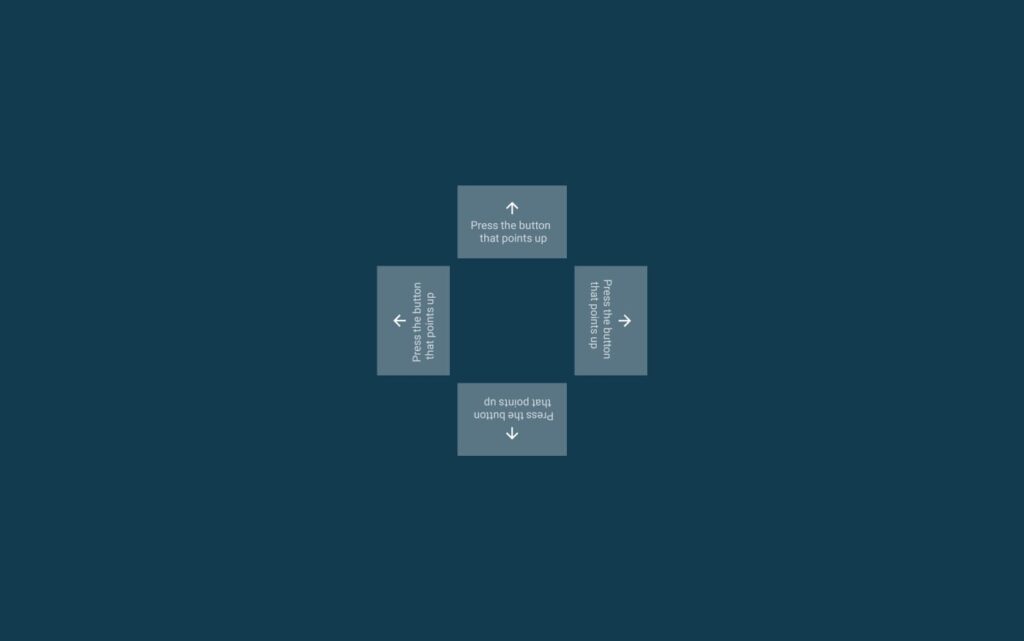
A screen with direction arrows will appear. This screen determines the direction and orientation of your screen. You must select the arrow that points upwards.
For touch screens/tablets, tap on the button that points upwards.
For external media players use the mouse or a touchpad to click on the button that points upwards.
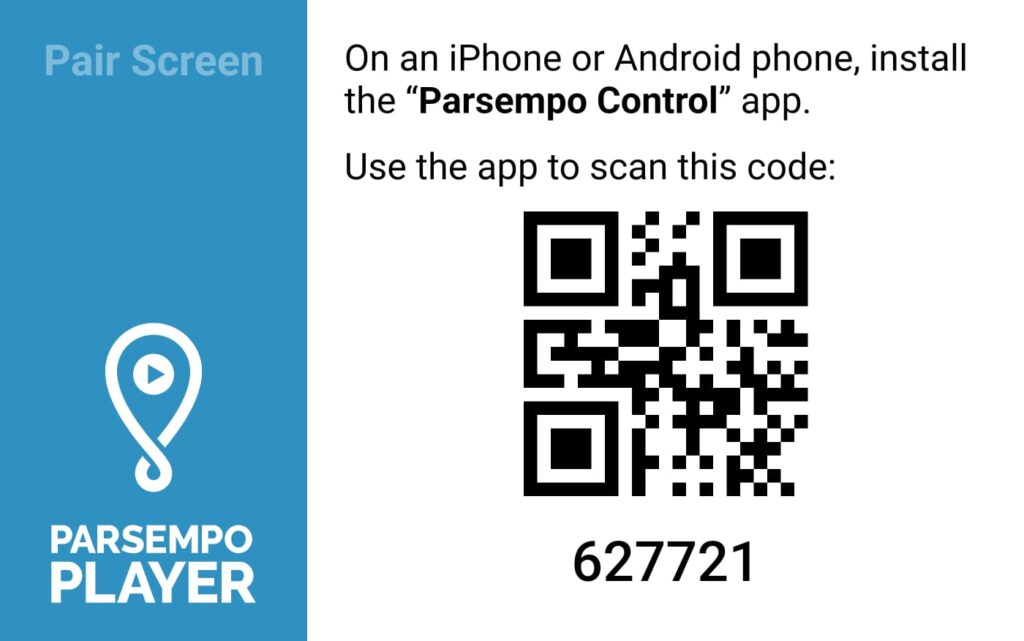
The next screen will display a QR code and a six (6) digit pin number
Step 2 – Pairing
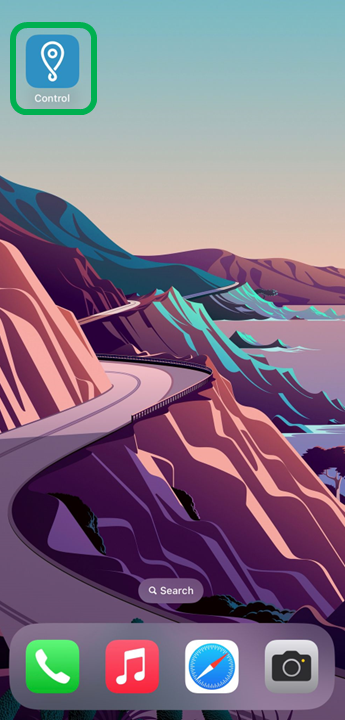
Open the Parsempo Control app on your mobile device.
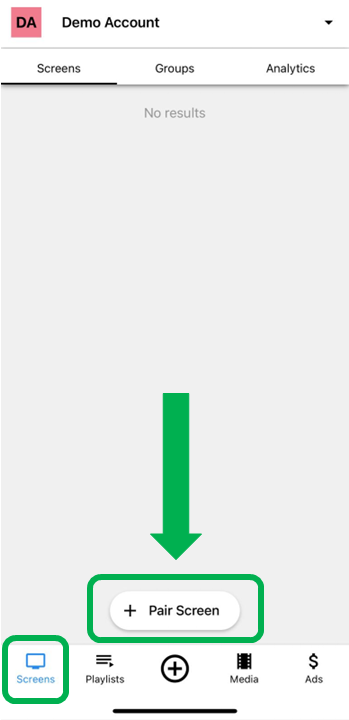
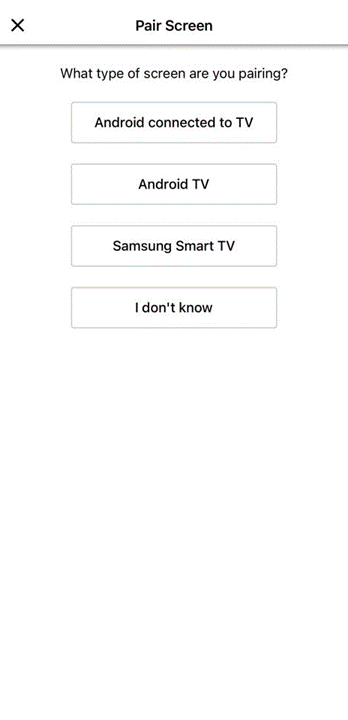
Under the “Screens” tab, select the “Pair Screen” button to initiate the pairing process.
On the first screen, please select the applicable installation type.
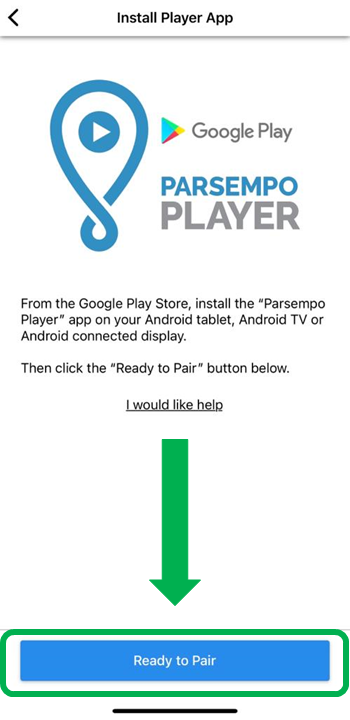
On the next screen, select “Ready to Pair”
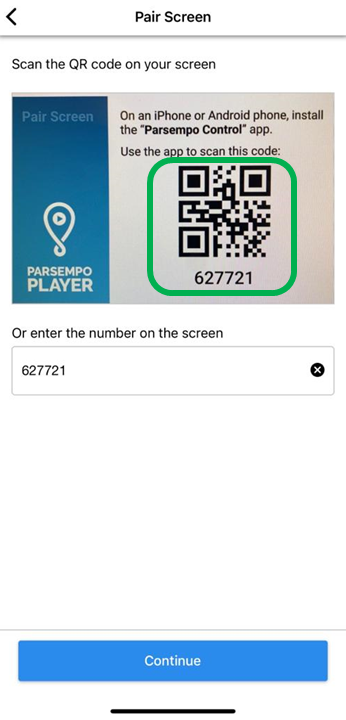
The following screen will display a live feed camera feed from your front-facing camera on your mobile device and an input field.
Use this screen to scan the QR code on your display or, alternatively, enter the 6-digit pin into the input field.
The screen is now successfully identified and now you will proceed to provide some basic configuration data.
Step 3 – Screen Setup
This stage is a guided wizard that will walk you through the initial screen setup.
In the first stage, you will need to select the “Venue Type” for the selected screen:
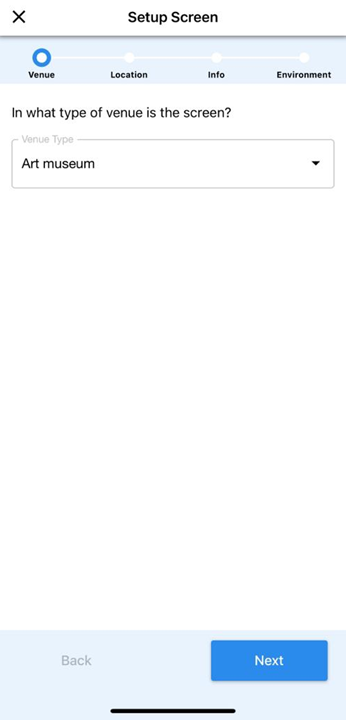
You can search for the correct classification from a drop-down list or search the database. If the venue type for your installation does not appear in the list, please click here to message support, and we will add it to the list.
In the next stage, you will set up the screen location and related properties. The mobile device will use your current GPS location to fill out the address and timezone for the screen automatically.
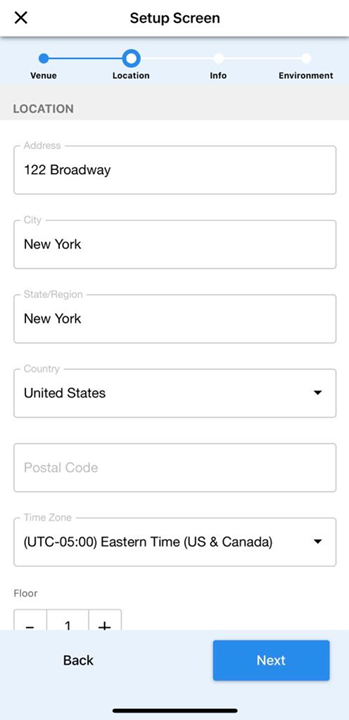
You can scroll down to add additional information:
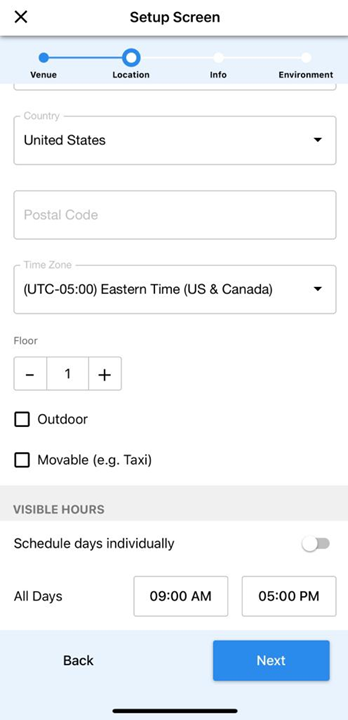
*Floor – the floor where the screen is installed
*Outdoor – If the screen is located in an outdoor environment (e.g., Billboard)
*Movable – If the screen is not in a fixed location (e.g., ridesharing or public transport)
*Visible hours – determines the operational hours for the screen (outside of operational hours, will not collect audience data, display advertising, etc.)
These inputs enable several system features and management options within the platform.
Once you are done, select the next button.
In the next stage, you will set up some basic screen information:
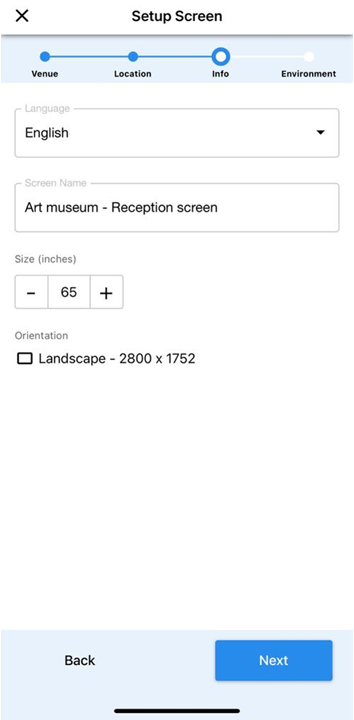
Language – currently enabled English & Hebrew.
Screen name – by default, our system combines the venue type you selected and the address; however, you can edit this field for personal or organizational context)
Size (inches) – discovers based on information reported by the screen. In certain cases, the screen will not report this data accurately, and it is recommended to modify the size to reflect the actual dimensions.
Orientation – Displays the recognized orientation as well as the resolution of your screen
Once you are done, select the next button.
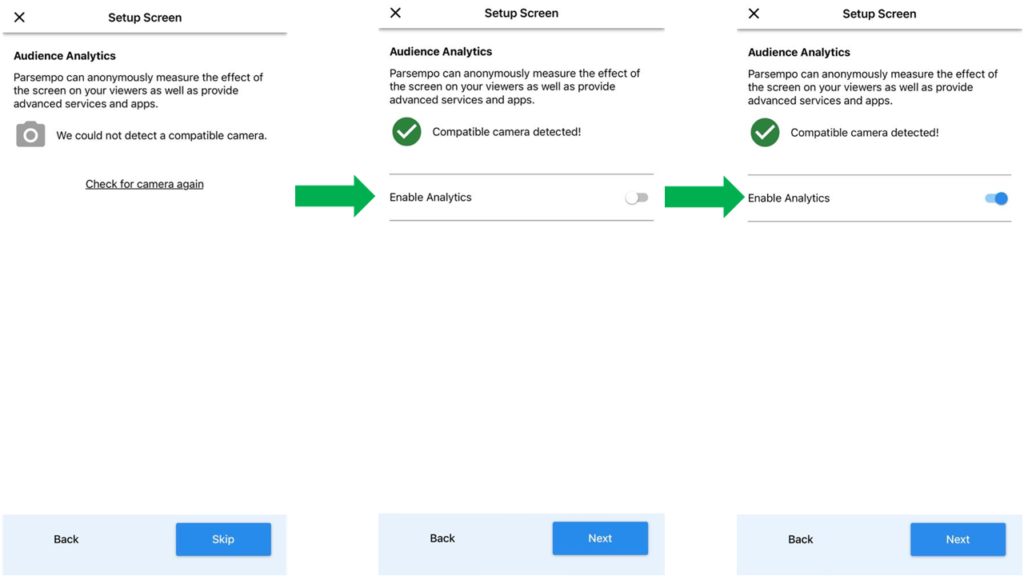
In the next and final stage, you can enable audience analytics for your screen.
Parsempo automatically detects if a camera is connected to the Player. If detected, you get prompted to enable Analytics. If you do not have a built-in camera or external webcam connected to the display, you can turn on this feature later from within the profile of the screen in the control platform.
On the next screen, use the phone camera to photograph the screen. You may have to move back or forward for the screen to fit the box in your phone App and then click the blue camera icon.
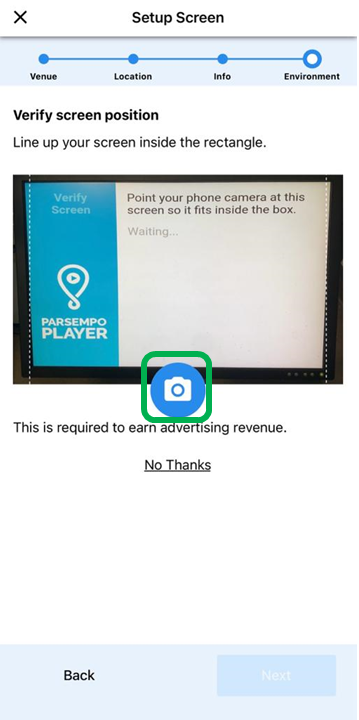
This step is necessary to enable programmatic advertising and can be skipped if not relevant by selecting “No thanks.”
If the image is successfully captured, you will see the confirmation on the screen “Your screen has been verified.” as it appears in the image below.
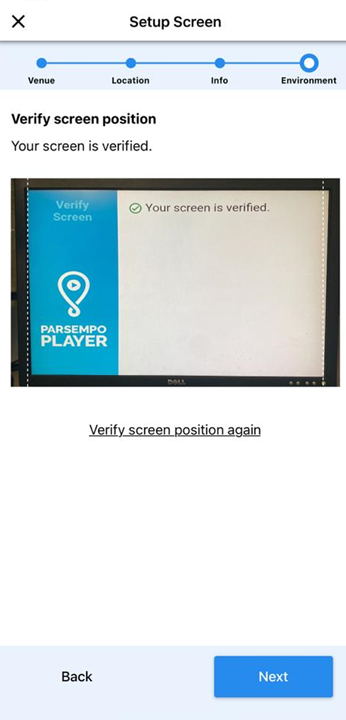
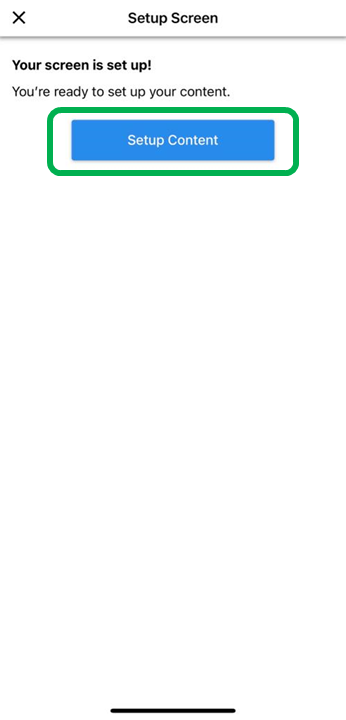
You have now complemented the pairing process and should receive the following confirmation and the option to move forward to setting up some basic appearance options by selecting the “Setup Content” button.
Step 4 – Content Setup
This step is a short wizard for setting up the layout, design, and applications for your display.
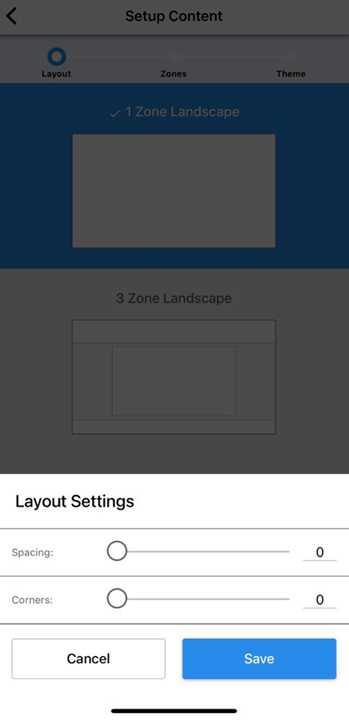
In the first stage, you will select the layout for the screen.
There are several reset layouts you can choose from, or you can create your own in the Layout builder.
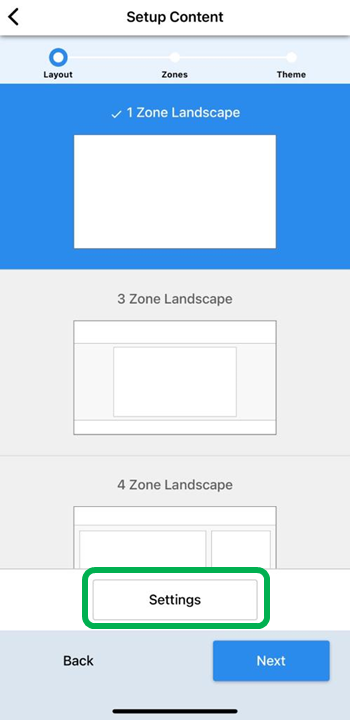
Any layout you choose will appear immediately on the screen, and you can optimize the spacing and design of the different zones by selecting the settings button Highlighted above, which will open up the properties slider that you can adjust, as seen below.
Now that you have selected your layout, you can go to the next stage and assign apps to the various zones in your layout in the following screen.
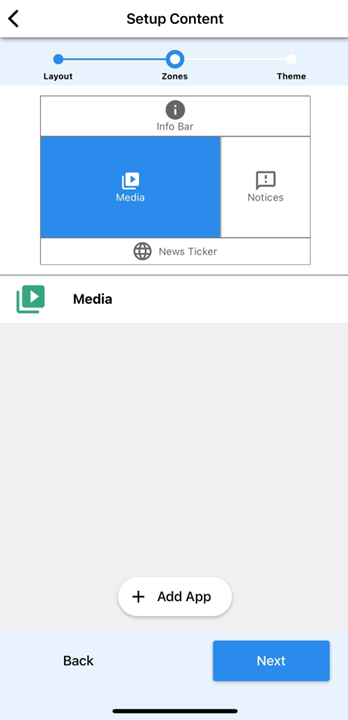
There are various applications available in the Parsempo App Store that can be assigned to the different zones in your selected layout.
Currently, the system assigns several most used apps to the different zones automatically, and you can remove/add them as necessary.
For a deeper review of zones and apps, please refer to the zones and apps tutorial.
For the final stage, you will select a background color (theme) for your layout, as displayed on the following screen. (Not applicable to single zone layouts)
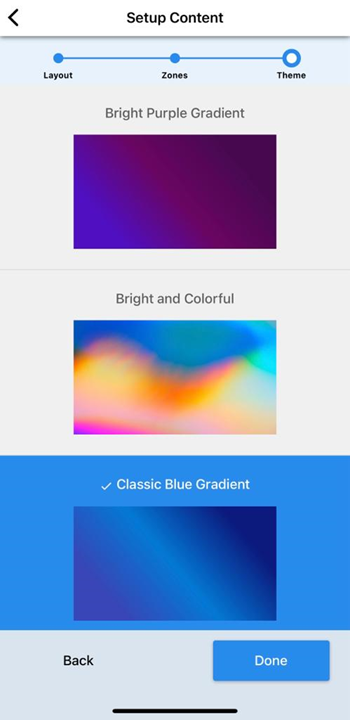
You can scroll down to use any color scheme that suits your application and add your own background themes.
Congratulations! you have successfully added your first screen to your network, and it should appear in your account, as demonstrated in the following scene.
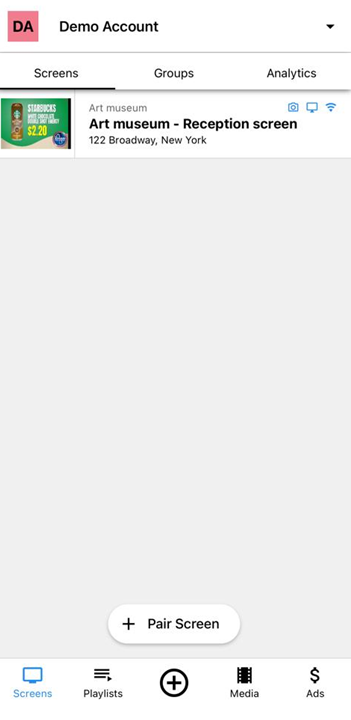
All the settings configured during this process can be changed at any point by going into the Screen Profile under the screens tab in your account.